How to Remove and Change an Apple Watch Band in a Few Easy Steps
If you're looking to refresh the look of your Apple Watch, switching bands is a quick and easy way to do it. Whether you’re upgrading for style, comfort, or functionality, here’s a simple guide to help you with changing your Apple Watch band.
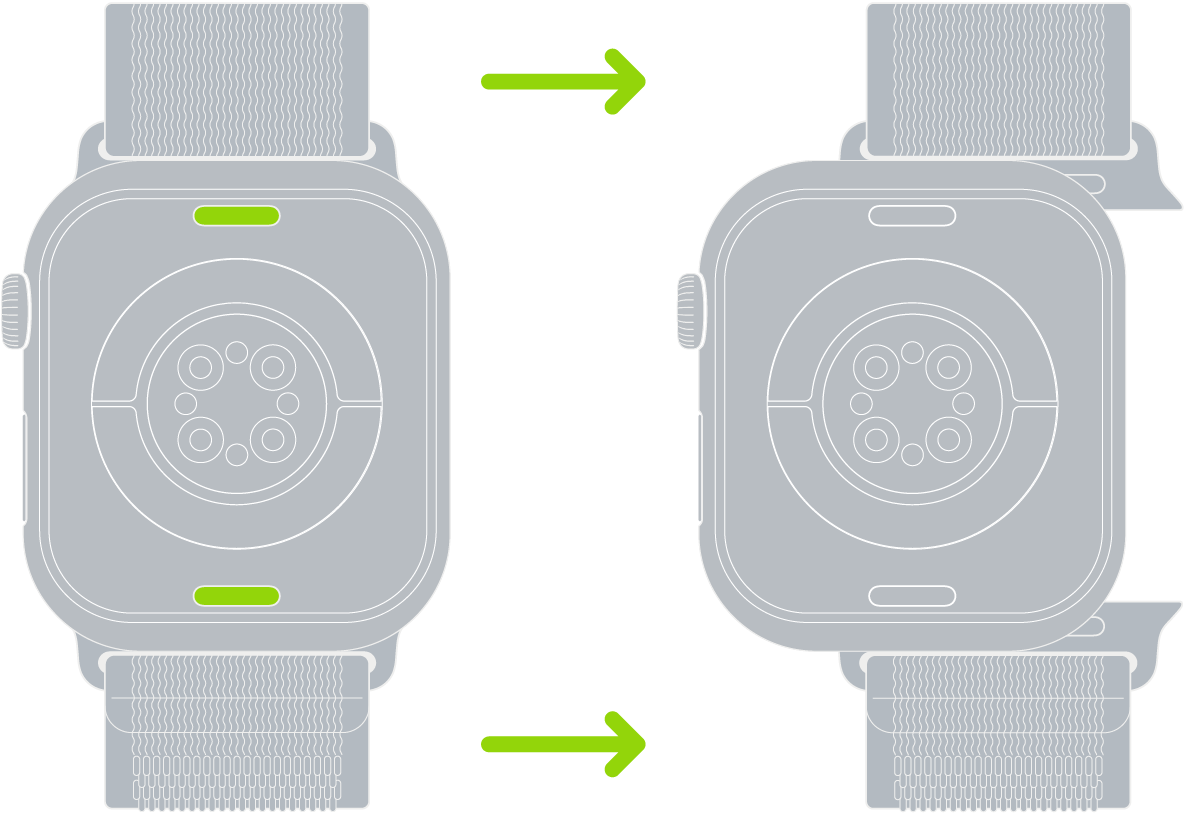
Step 1: Remove the Current Apple Watch Strap
Removing an Apple Watch strap is straightforward. Begin by turning your Apple Watch over so that the back is facing you. You’ll notice two small buttons near the band connection points. To remove the Apple Watch band, press and hold one of these release buttons while sliding the band out of its slot. Repeat this for the other side to completely remove the band.
Step 2: Attach the New Band
Once you've successfully removed the old strap, it's time to attach the new one. Align the new band with the slot and slide it in until you hear or feel a click. This ensures that the band is securely in place. Changing an Apple Watch band only takes a few moments, and you’ll be ready to enjoy a fresh look!
Step 3: Ensure Proper Fit
After changing the Apple Watch strap, check that the band is snug and comfortable. The good thing about switching Apple Watch bands is that it allows you to customize your watch for any occasion, whether you prefer a sporty look or something more elegant.
Step 4: Purchase New Apple Watch Straps From Us!
Should you wish to buy additional Apple Watch Straps or Apple Watch Bands, why not buy from us and get 50% off and free shipping today!
Click HERE to browse our complete collection.